











About selecting and paying for a paid plan
 About selecting and paying for a paid plan
How to Choose a Paid Plan
Only the
Administrator account can apply for a paid plan.
Access the Pricing Plan Screen
The way to access the pricing plan screen varies depending on your usage situation.
Please refer to sections A, B, and C below to access the pricing plan screen.
When applying for a paid plan after the 30-day free trial ends:
Click the Select a plan to continue using the data button on the screen shown after your 30-day free trial ends.
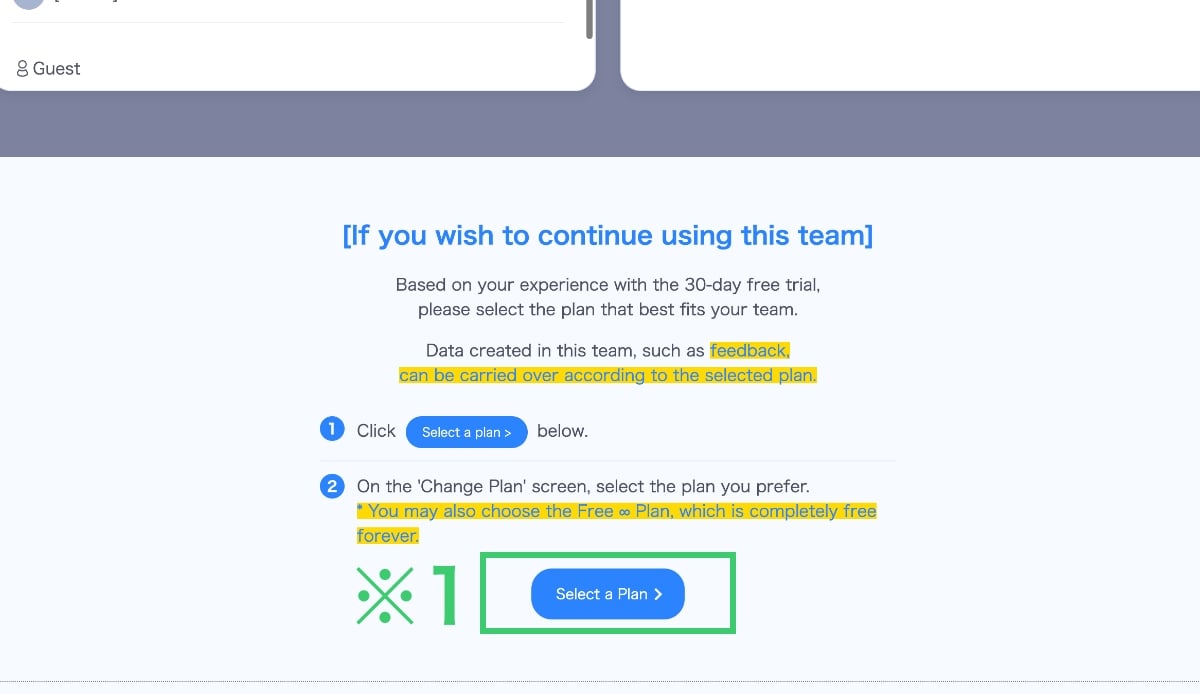
※Click the image to view it in full size.※Tap the image to view it in full size.
When changing an existing team’s plan to a paid plan:
On the team’s Home screen, open the Payment info tab and click Change Plan under Subscription.
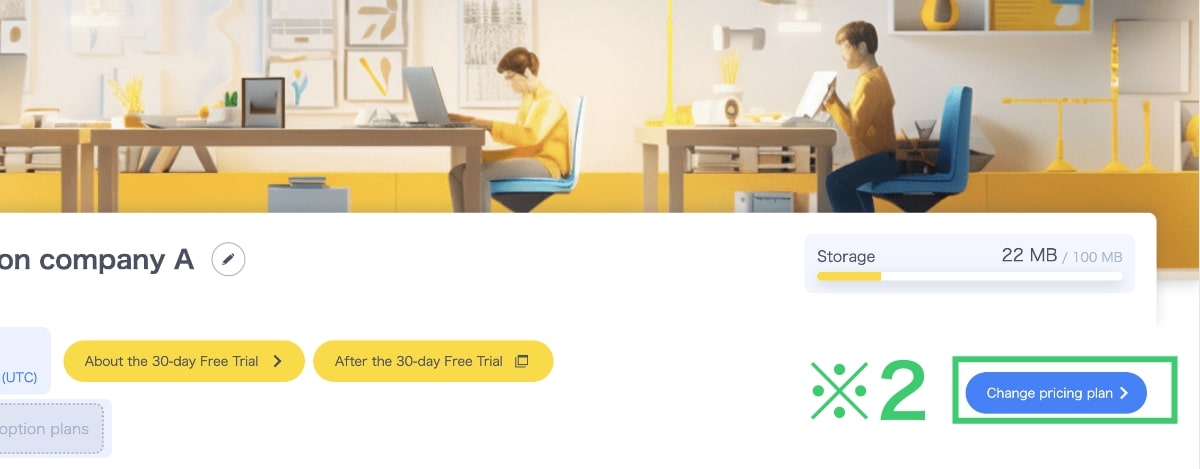
※Click the image to view it in full size.※Tap the image to view it in full size.
When creating a new team and applying for a paid plan:
Click the user icon in the upper right of the screen, then click the + next to Teams.

※Click the image to view it in full size.※Tap the image to view it in full size.
Select the Number of Members/Guests in the Team
The Basic Plan Selection screen appears.
Under “Compare plans that fit your team by users and features”, select the number of Members/Guests belonging to your team.
※ Selecting “All base plans” shows every basic plan.
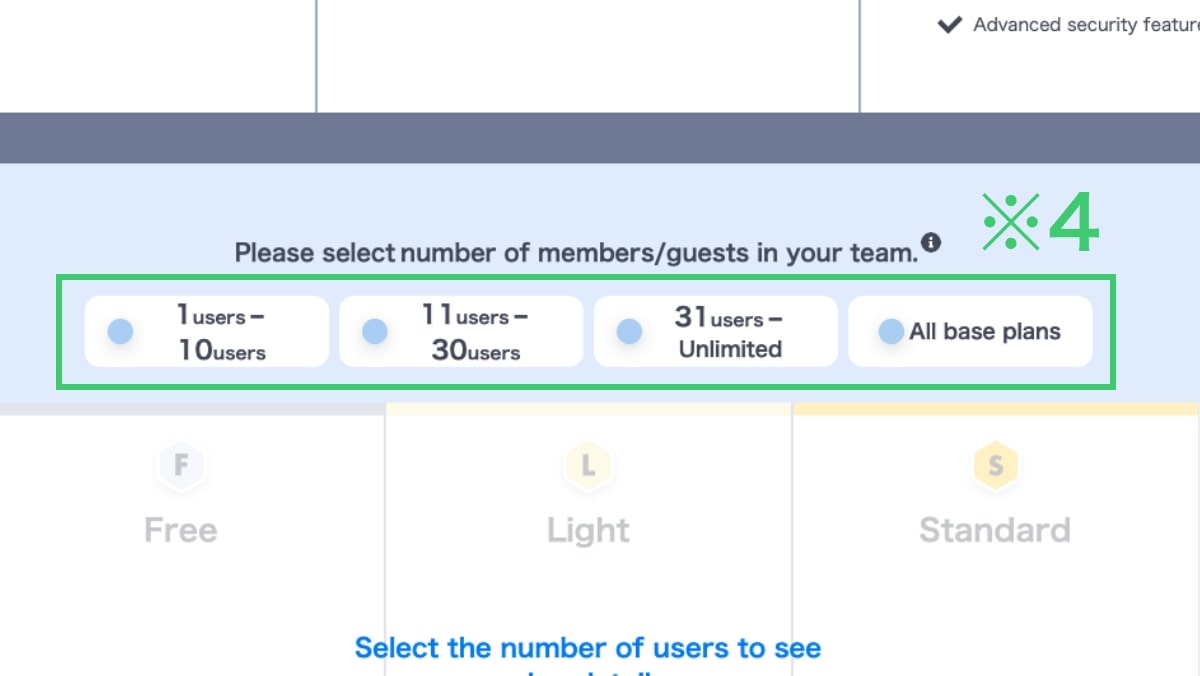
※Click the image to view it in full size.※Tap the image to view it in full size.
Choose Your Preferred Basic Plan
Plans matching the number of members/guests selected in Step 2 are displayed.
Click Select this plan for the Basic Plan you want.
Before applying for or changing a plan, please check the currently available features, storage capacity, and pricing details carefully before making your selection.
Please note that features listed as “Coming Soon” or “Planned for Release” may be subject to change upon official launch.
You may start with the free plan to determine the most suitable paid plan for your team.
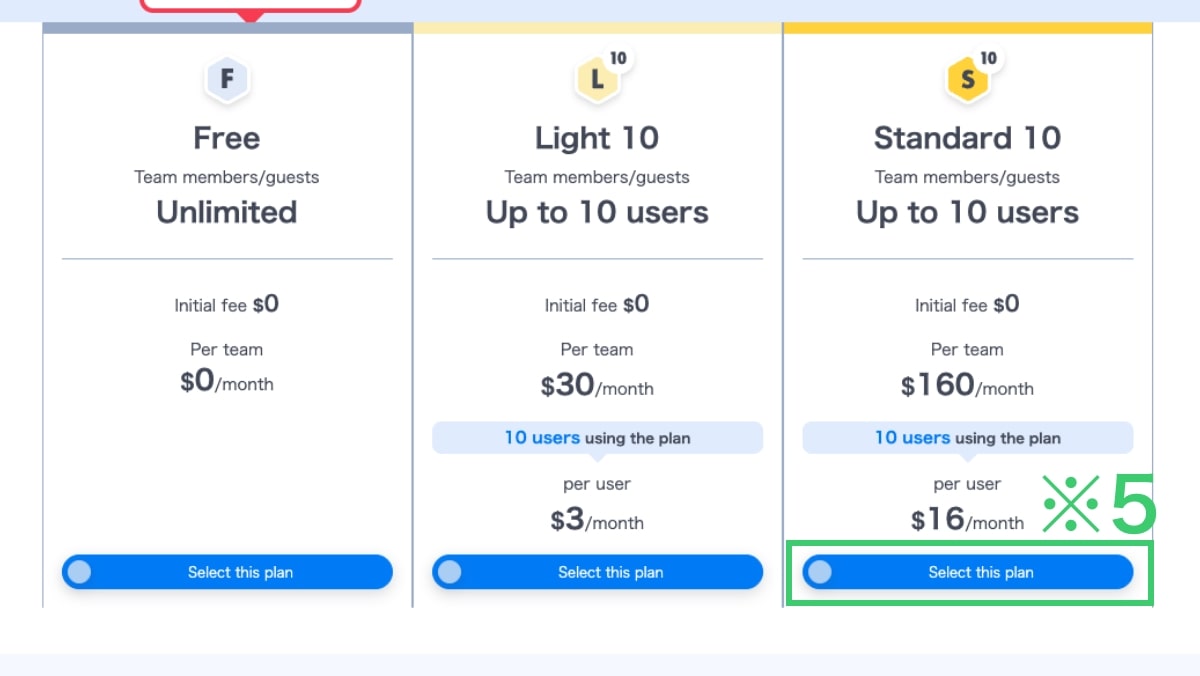
※Click the image to view it in full size.※Tap the image to view it in full size.
Proceed to Purchase
At the bottom of the screen, the selected plan and the monthly fee※1 are displayed.
After reviewing them, click Proceed to purchase※2.
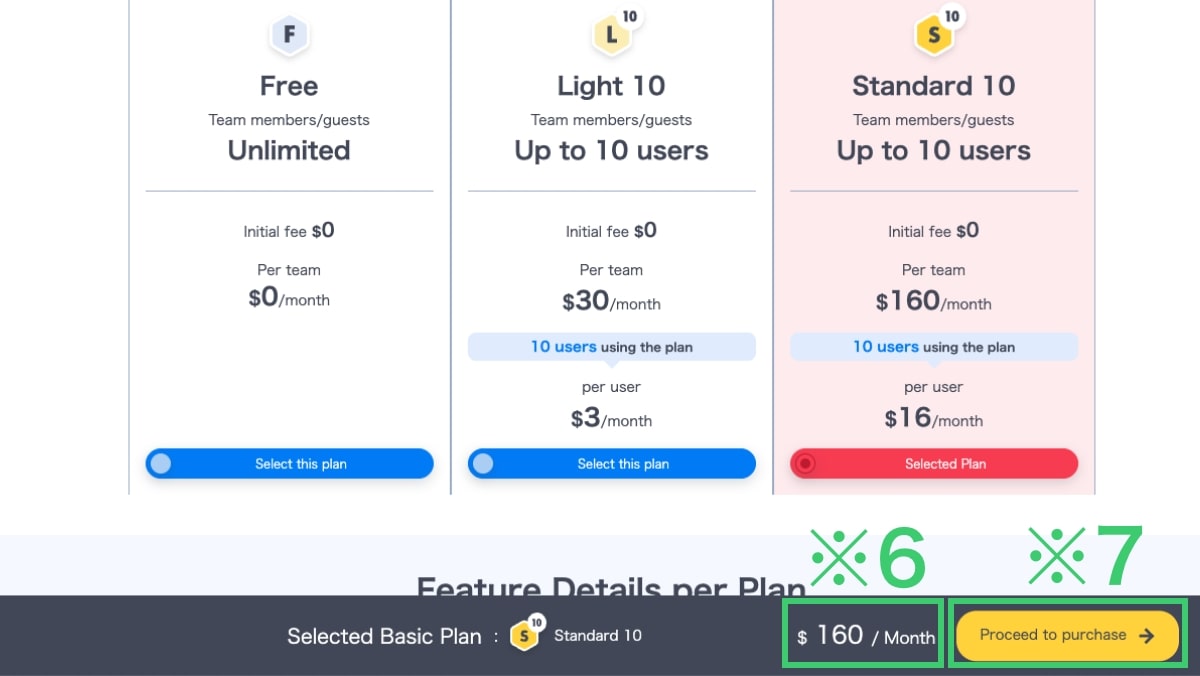
※Click the image to view it in full size.※Tap the image to view it in full size.
Confirm Feature Limitations by Plan Change
Depending on the selected Basic Plan, some features may be limited.
After reviewing the displayed details, choose one of the following options:
If you wish to change the plan,
Click the Plan Review button※1.
If you wish to purchase the selected plan
Click the Proceed to purchase button※2.
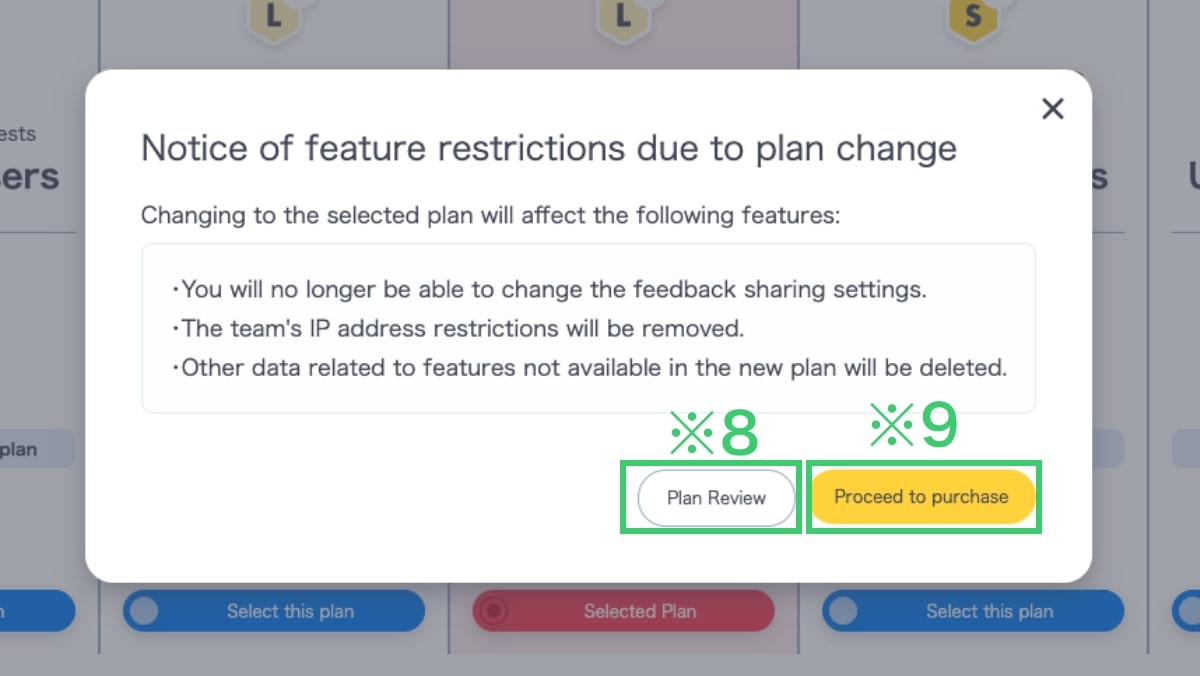
※Click the image to view it in full size.※Tap the image to view it in full size.
That completes plan selection. Next, proceed to payment.
Please see below for the payment flow.
Payment Flow for Paid Plans
Notes about paying by credit card
- Billing is monthly and prepaid.
- For the first month, you will be charged a prorated amount (per second) from the time you click “Purchase” until the end of the month.
- From the second month onward, the fee for that month is charged automatically on the 1st.
- Your subscription renews automatically unless canceled and is billed to the registered card.
- If payment is not completed within 90 days of invoice issuance, your paid plan, team, and team-linked data may be deleted automatically.
- Payments are non-refundable upon cancellation unless required by law.
Check the payment terms
When you proceed to purchase a paid plan, the Payment Terms and Conditions are displayed.
Review them, tick “I have confirmed the above”※1, then click Agree & Continue※2.
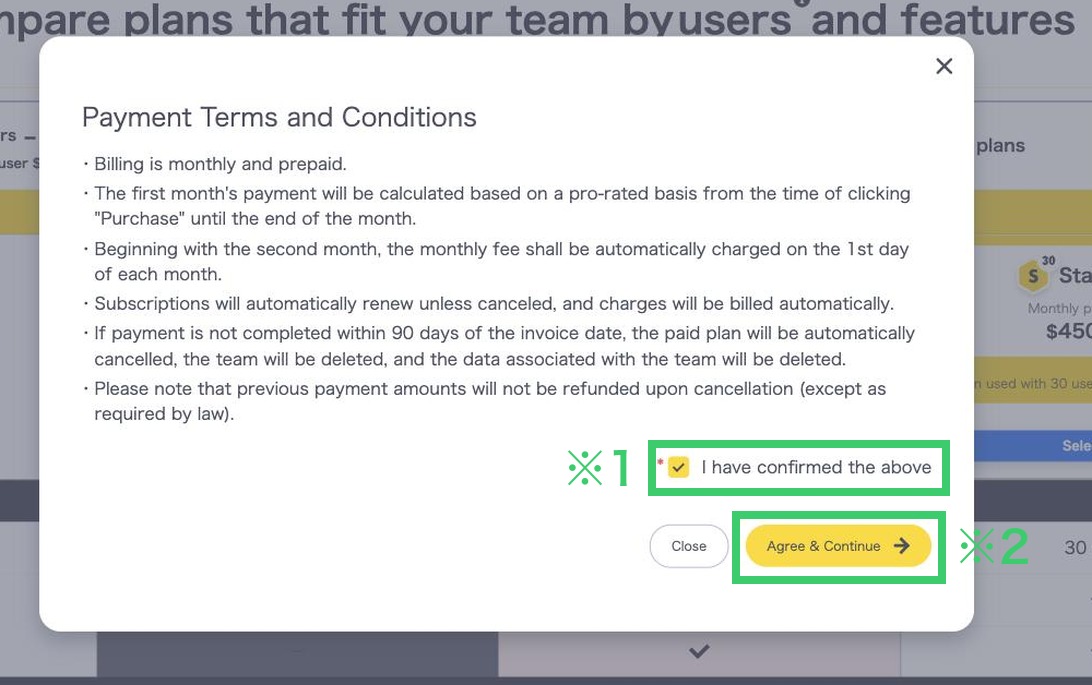
※Click the image to view it in full size.※Tap the image to view it in full size.
Enter your card details
You are taken to Stripe’s secure checkout page.
Enter your card number, expiry date and CVC※1, then the cardholder name※2.
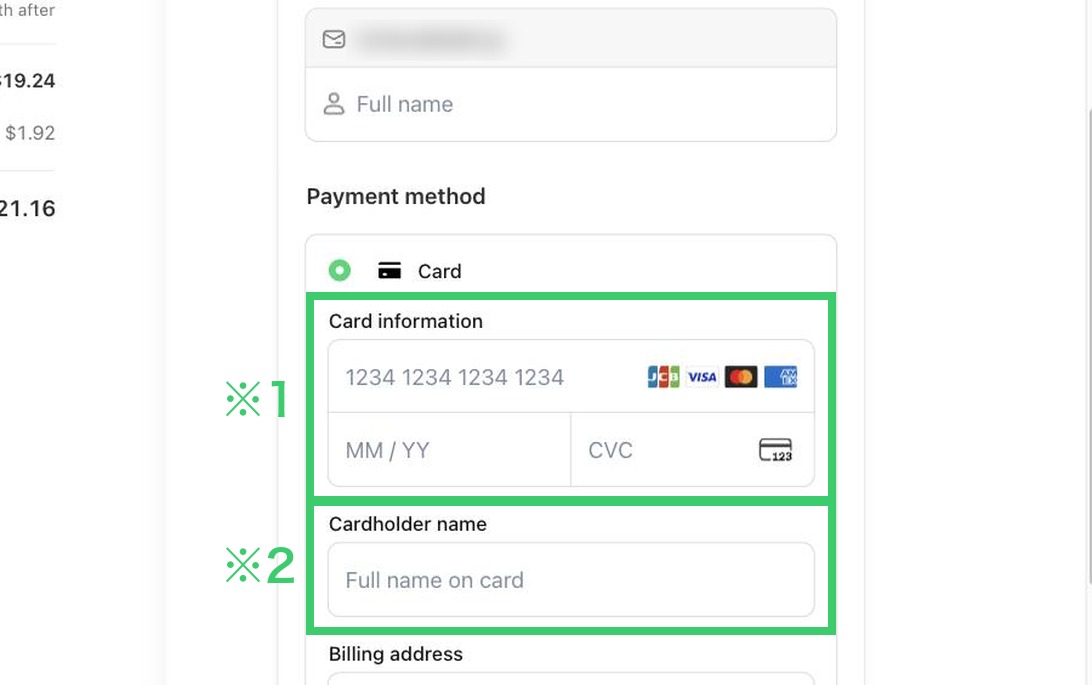
※Click the image to view it in full size.※Tap the image to view it in full size.
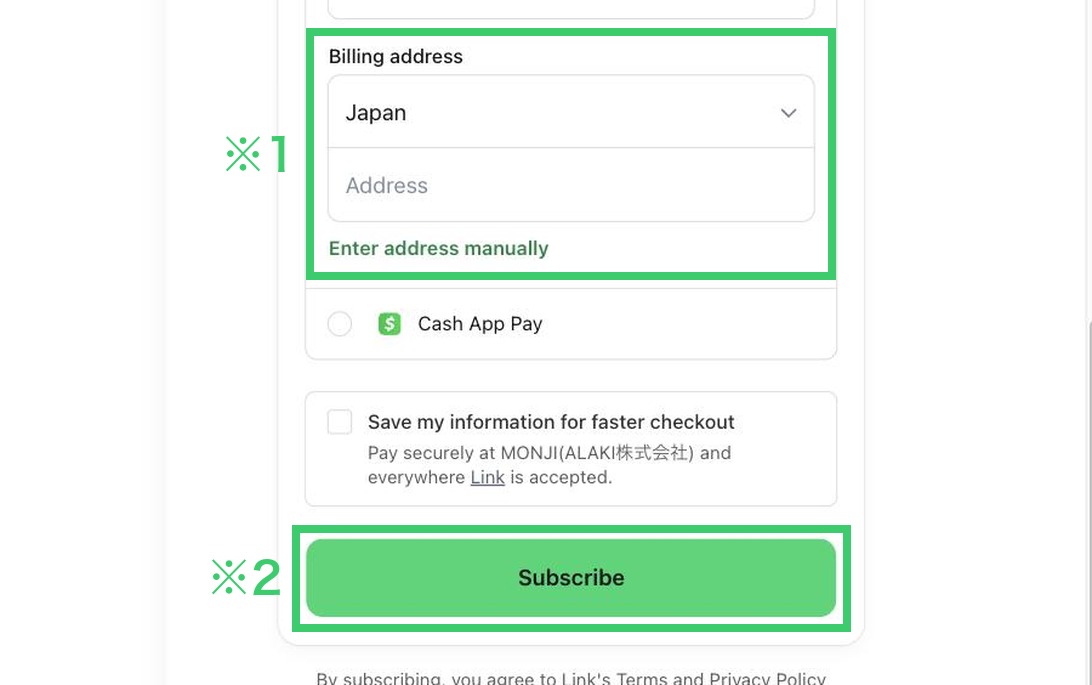
Enter your billing address and subscribe
Enter your billing address※1, then click Subscribe※2.
※Click the image to view it in full size.※Tap the image to view it in full size.
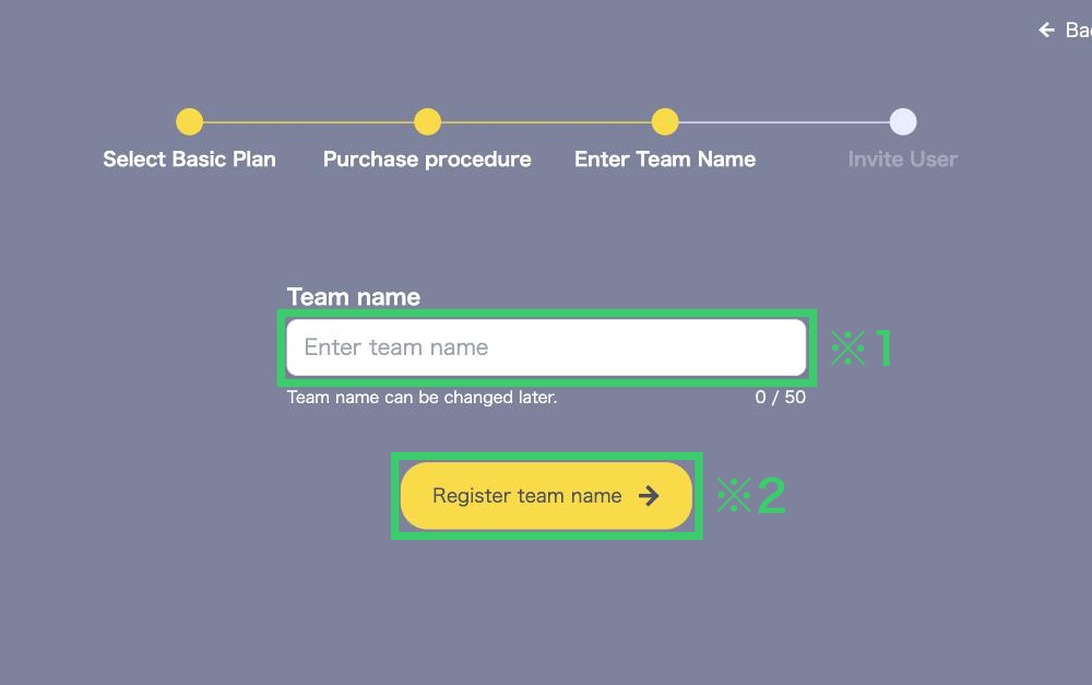
Enter your team name
(only when creating a new team)
The team name screen appears only when you apply for a paid plan from Create New Team.
Enter a team name※1, then click Register team name※2.
※ You can change the team name later.
※Click the image to view it in full size.※Tap the image to view it in full size.
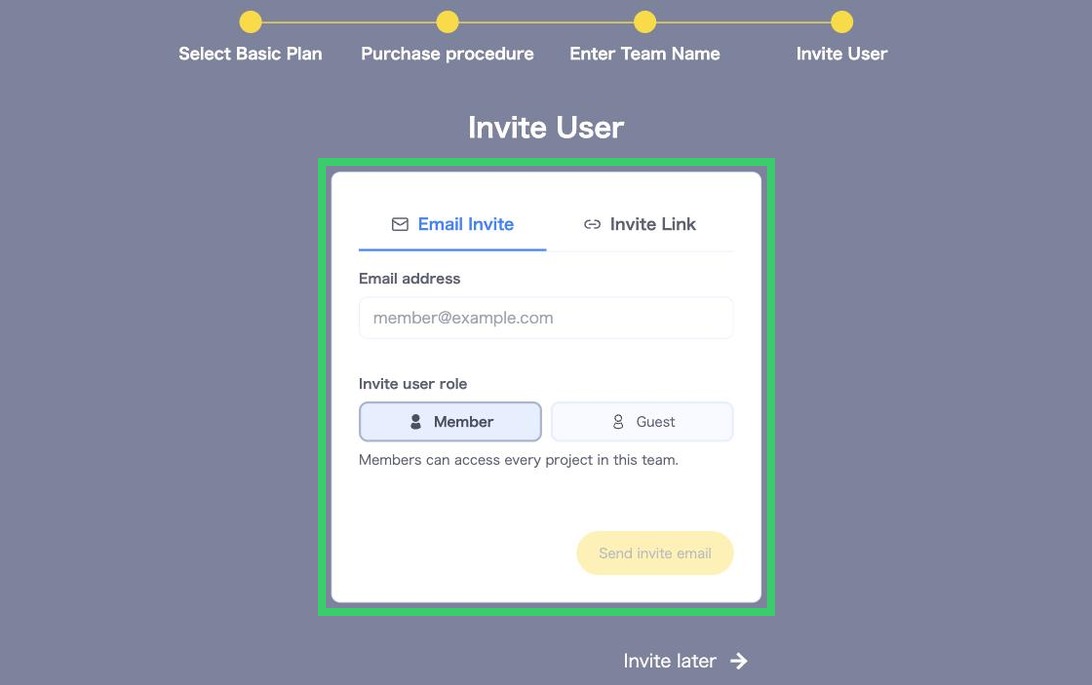
Invite members and guests
(only when creating a new team)
Invite people to your team by email or with an invite link.
※Click the image to view it in full size.※Tap the image to view it in full size.
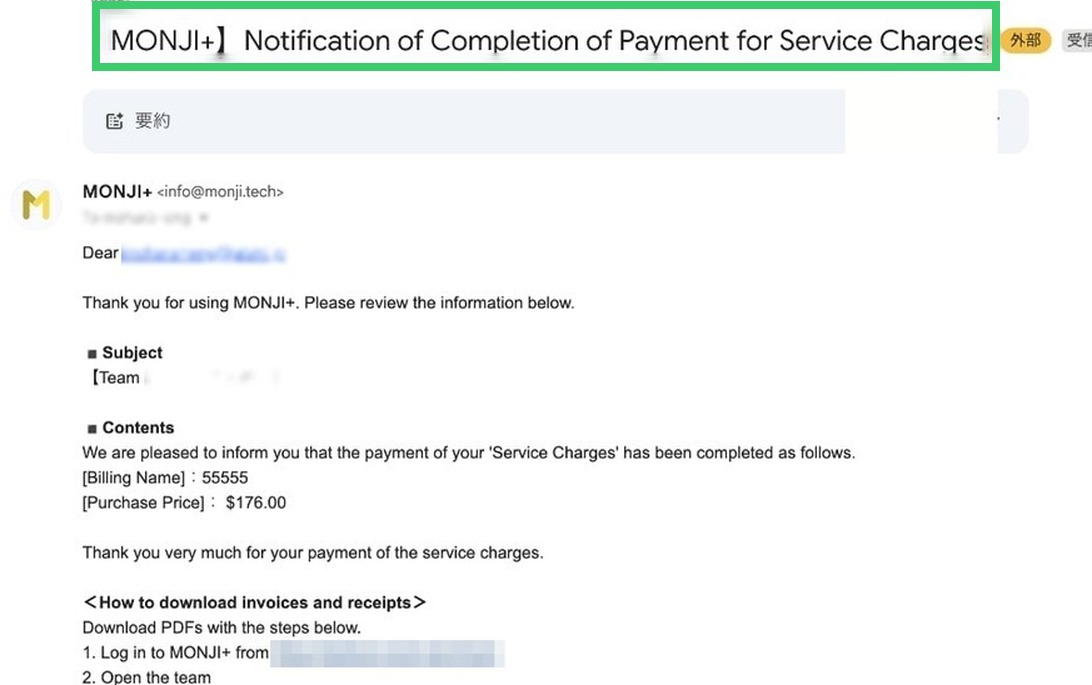
Check the payment confirmation email
An email titled “MONJI+ Notification of Completion of Payment for Service Charges” is sent to the administrator’s registered email address.
That completes the payment. Enjoy MONJI+ on your new plan.
※Click the image to view it in full size.※Tap the image to view it in full size.